Halloween Recipe Roundup

Hi, kiddos!!!

Can you believe that it’s the last Monday in October?

And that Halloween is on Saturday?

Which means that Halloween can be an all-day affair!! (so invite all your favorite people over and let the festivities begin!)

In honor of Halloween falling on the weekend, I have rounded up some of my favorite recipes that you can serve throughout the day to your costumed, candy cravin’ crew.

For Breakfast:

IMG_6155

Pumpkin pancakes are a simple breakfast that can be whipped up in no time, feeds a crowd, and highlights the star of the season – definitely a family friendly Halloween breakfast!

IMG_1548

If you want something pumpkin-free for breakfast, these Banana Walnut Pancakes are a sure-fire hit (plus they still have all the delicious fall spices inside).

IMG_1669

Pumpkin bread may not seem like breakfast fare for many people, but there is nothing better than having a slice with a cup of coffee or tea before all the Halloween craziness begins…

For Lunch/Dinner:

IMG_2310

This Spicy Butternut Squash soup is simple to throw together earlier in the day, pop into the fridge, and then reheat for lunch or dinner. This soup is spicy, so if you’re serving it to people who are sensitive to spice, pull back a bit on the cayenne pepper.

IMG_1661

If you want to fuel up your little trick-or-treaters before a night of candy hunting, these Stuffed Acorn Squash Halves fit the bill. They are full of the flavors of the season and are absolutely delicious.

For Dessert (because candy can’t be the only thing sweet!):

IMG_2261

Mini Pumpkin Chocolate Chip Muffins are my go-to, absolutely favorite dessert for Halloween. Pumpkin + Chocolate = Friends Forever.

IMG_2424

If you want a fancier dessert for your Halloween table, Apple “Jack” Donut Cake is not only delicious but beautiful as well. Bonus? You can make it the day before – it gets better as it sits!


Have a great week leading up to Halloween, everyone!

oxox,

C

Apple “Jack” Donut Cake

IMG_2421

As you have learned from the past few weeks of blog posts, I love fall. From the changing leaves to the pumpkins everywhere to the seasonal foods, fall is definitely my favorite season.

One of my favorite fall traditions is going with my family to a local farm to buy apples, look at all the different pumpkins and gourds, and dig into fresh apple cider donuts. A relaxing day spent with the people I love… and cider donuts.

Apple cider donuts are an interesting food. They are soft, cake-like, and spiced on the inside with a firm outer crust that is covered in sweet sanding sugar… basically the perfect balance of textures and flavors. I love apple cider donuts so much that I actually had them instead of cake for my 6th birthday!

The apple farm is usually swamped on weekends, so apple cider donuts have been hard to come by this season. But when my mom showed me a recipe that she saw on Facebook for APPLE CIDER DONUT CAKE, I was sold. We had to make it and we had to make it now.

With a few tweaks, I think we made a pretty delicious cake. There are a couple stages of ingredients and steps, but the results are definitely worth it.

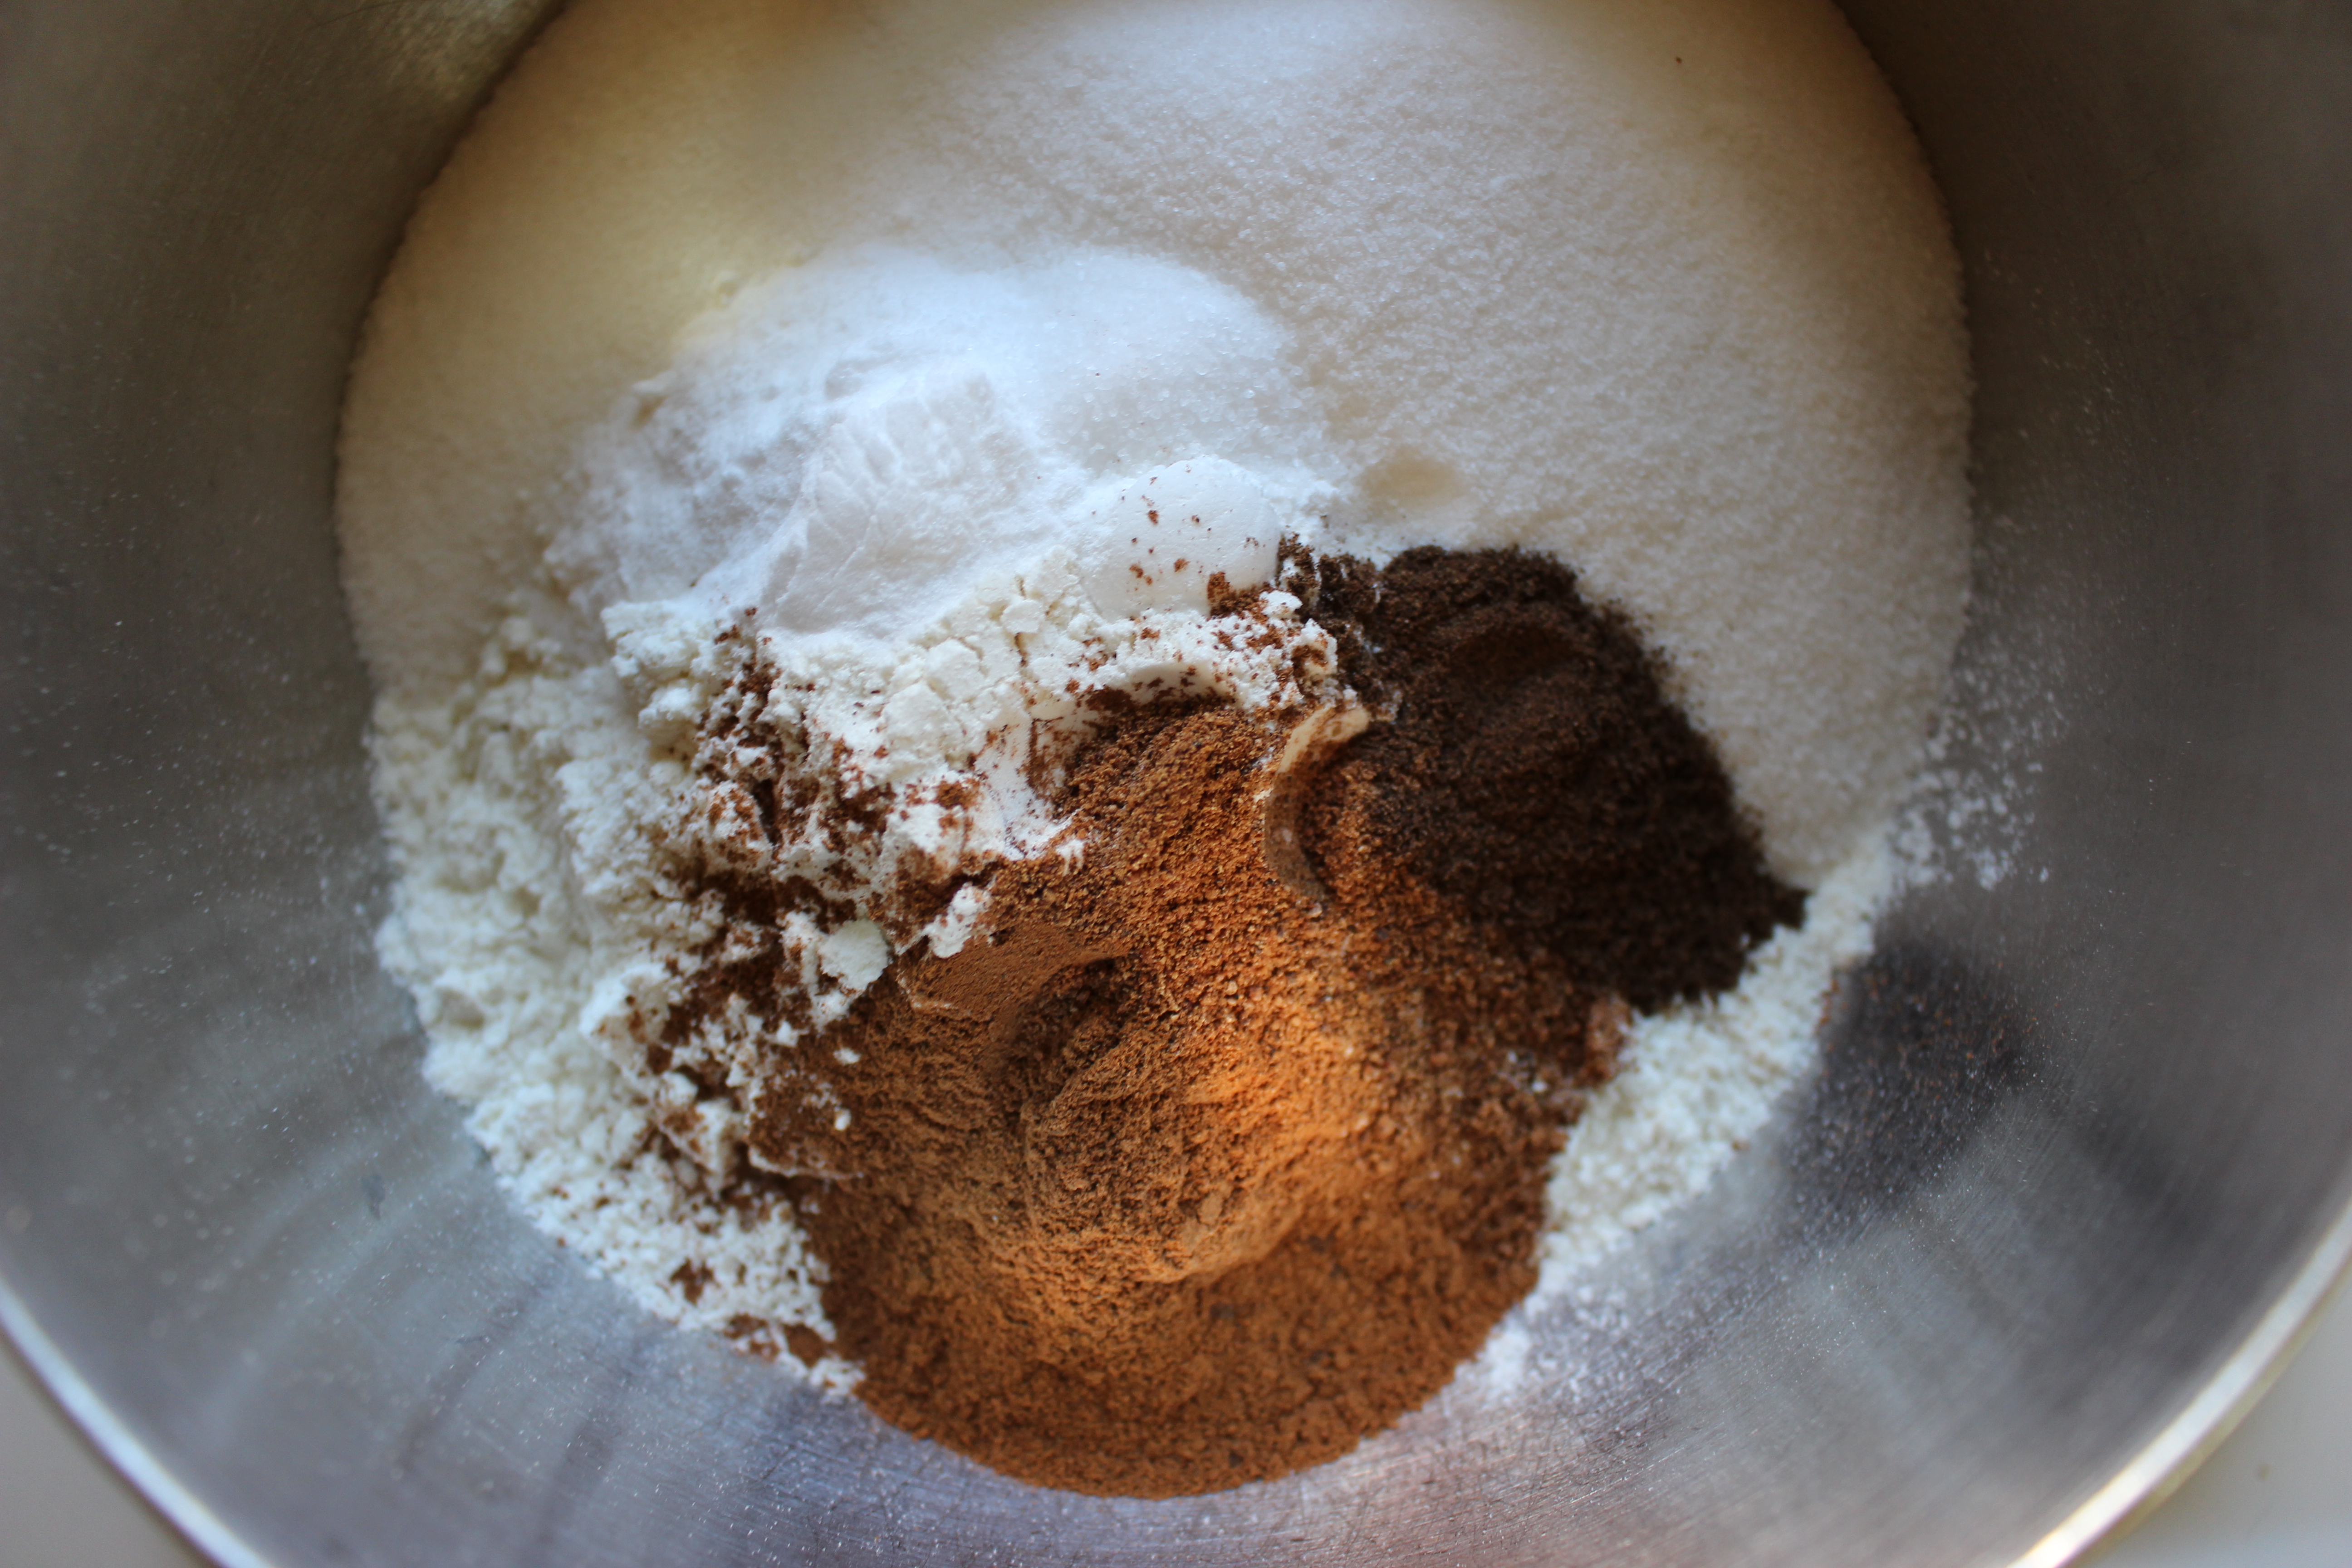
It starts with the dry ingredients.

IMG_2338

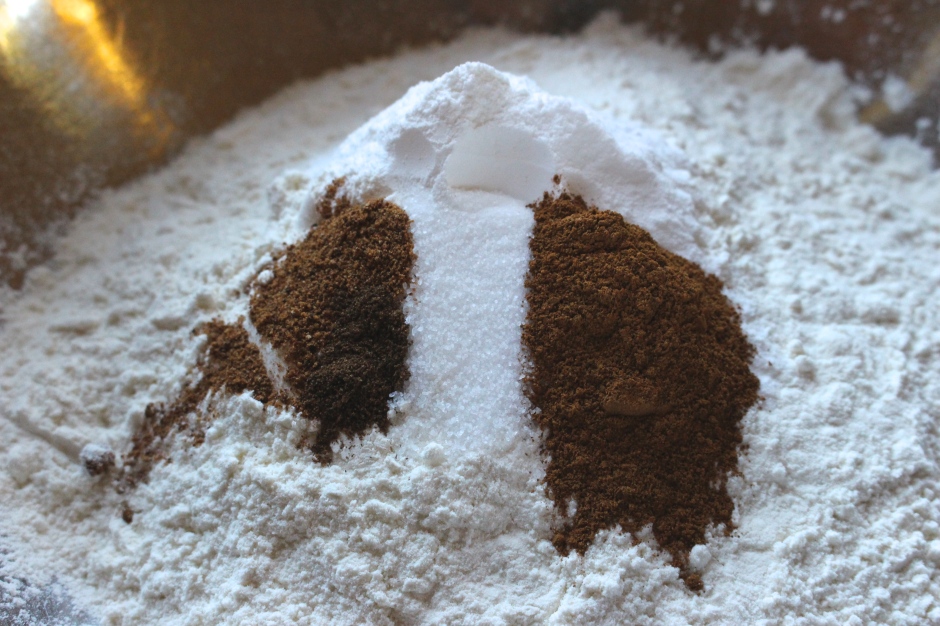
In a large bowl, I combined flour, baking powder, baking soda, salt, cinnamon, nutmeg, and allspice. Then set the bowl aside as I got the wet ingredients together.

The first component of the wet ingredients is an apple puree that is made from boiling cubes of apple in apple cider until they are soft and tender.

IMG_2337

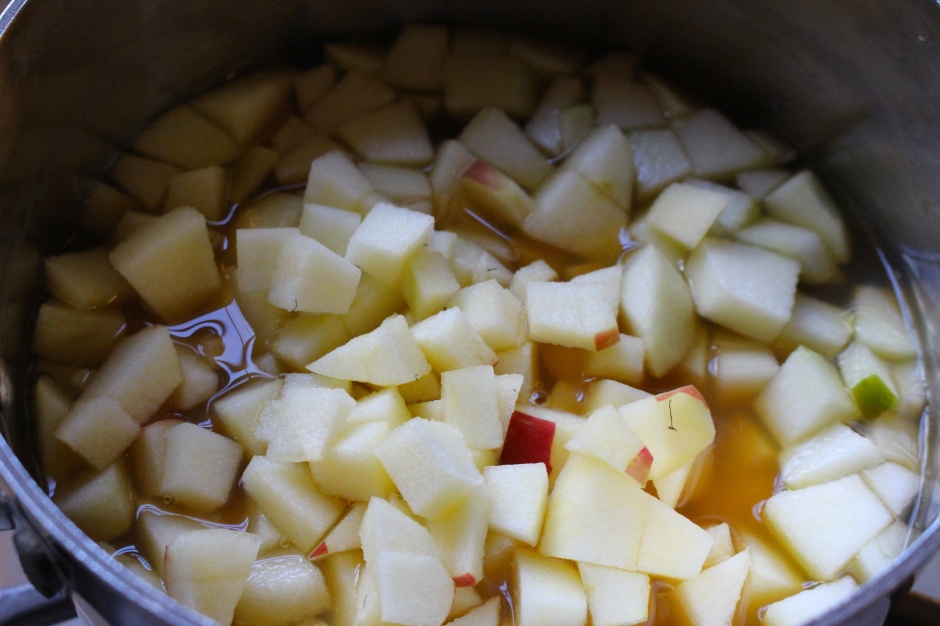
Any firm apple works here – I personally like granny smith or gala apples the best!
When the apples are tender, let the mixture cool slightly before transferring it to a blender or food processor. NOTE: when blending a hot liquid, only fill the blender up halfway and crack the top open and cover with a tea towel. This will prevent the top from flying off and hot apples going everywhere.

IMG_2342

Puree until completely smooth. Pour out one cup of the apple puree mixture – if there is not enough apple puree, add in some more apple cider to make up the difference. Then add in a ¼ cup skim milk – stir to combine and then set aside.

Now it’s time to bring out the big guns… your stand mixer!

IMG_2341

In the bowl of your stand mixer, combine some butter (okay, one stick), some granulated sugar, and some brown sugar. Beat until fluffy.

IMG_2343

Then slowly add in three eggs, some vegetable oil, and some vanilla bean paste or vanilla extract and stir until combine. Then, with the mixer on low, add in the dry ingredients alternatively with the apple puree – starting and ending with the dry ingredients. Mix until just combined. I recommend using a spatula to do one last mix to combine anything that is stuck on the bottom of the bowl.

IMG_2348

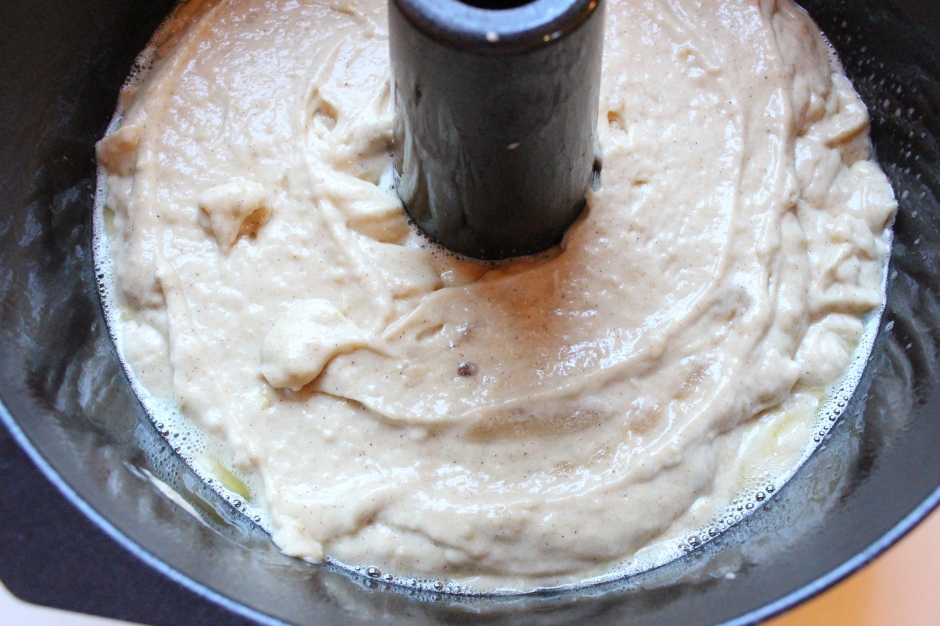
Pour the batter into a bundt pan, preferably one without a fancy pattern – this is a donut, after all! Bake the cake for 35-40 minutes until it is golden brown and a toothpick inserted inside comes out clean.

While the cake is baking, you can whip up the two “toppings” for the cake – a glaze and a cinnamon sugar sprinkle.

IMG_2350

For the glaze, heat butter, sugar, and water in a small saucepan over medium heat. When the mixture comes to a boil, let it cook for 1-2 minutes. Remove the syrup from the heat and add in some…

IMG_2353

… whiskey! Apples and whiskey (just like bananas and whiskey) go together really well. If you don’t like whiskey, you can substitute some apple cider instead. Then set the glaze aside until the cake is done.

Now, all that’s left is to make the cinnamon sugar.

IMG_2357

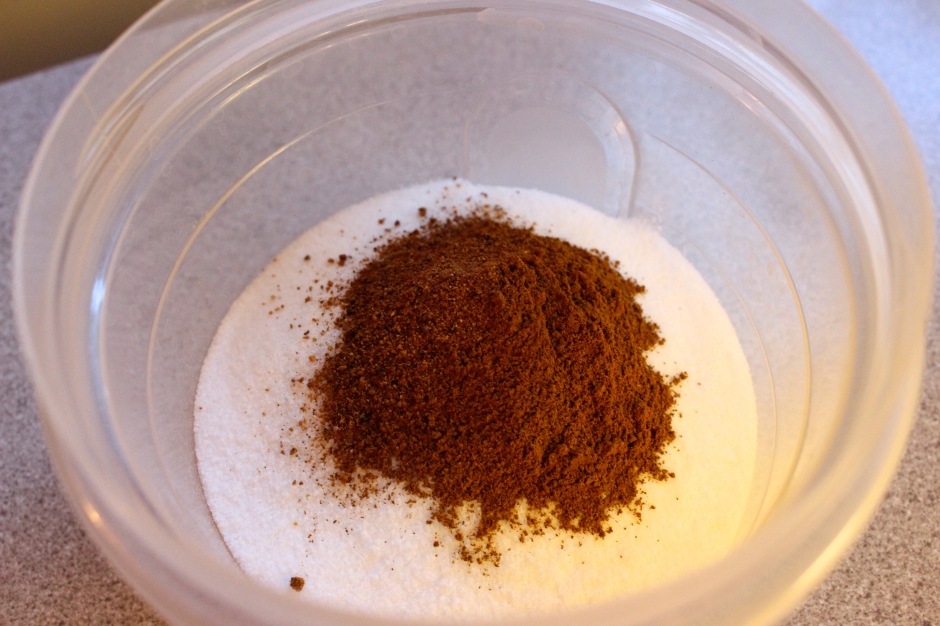
In a jar with a tight-fitting lid, combine sugar, cinnamon, and nutmeg. Screw on the lid and shake vigorously until combined.

Now we assemble!

IMG_2379

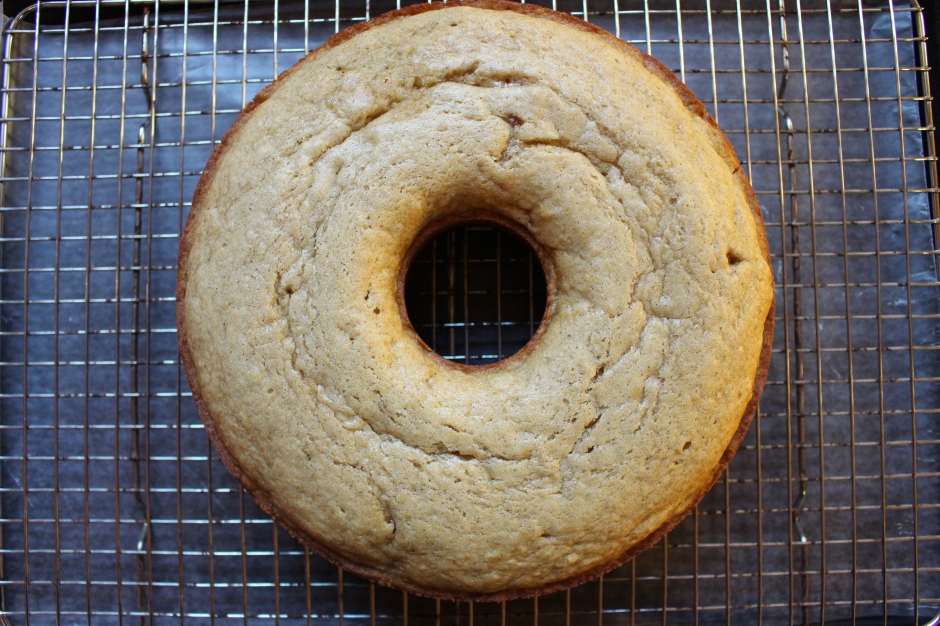
When the cake is done, cool it for a few minutes in the bundt pan then turn it out onto a cooling rack set over a wax paper-lined baking sheet. Let the cake cool slightly.

IMG_2380

When the cake has cooled, start to brush the cake with the whiskey syrup. I do this in several stages to allow for maximum syrup soakage.

IMG_2387

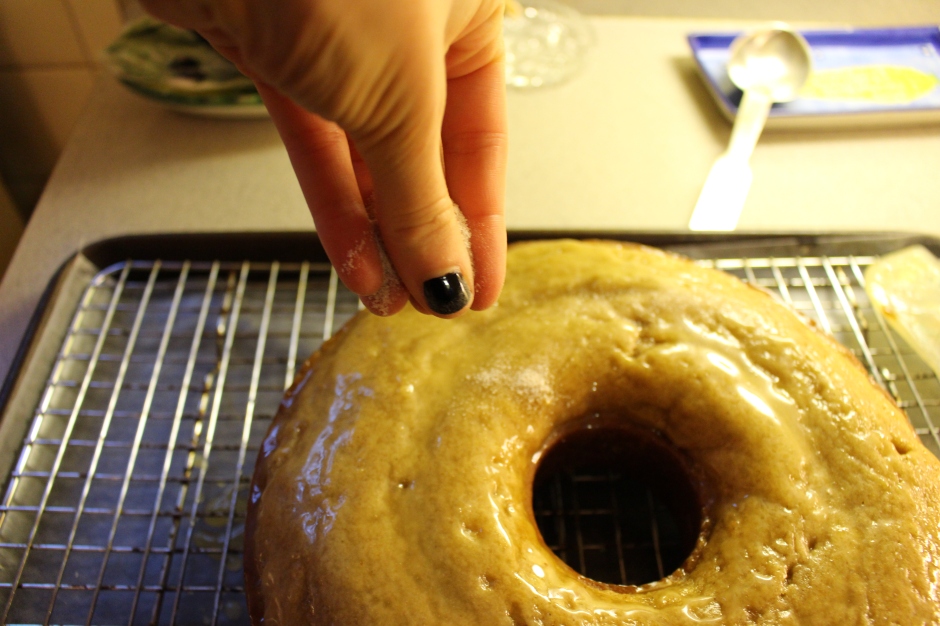
When all the syrup has been brushed on the cake, sprinkle on half the cinnamon sugar mixture onto the cake, making sure to cover the top and the sides. Wait 10 minutes and repeat with the other half of the cinnamon sugar.

Now it’s time to dig in!

IMG_2424

Not quite the same thing as a cider donut, but delicious nonetheless… A perfect homage to a childhood favorite!

So, kiddos, do you like cider donuts? What’s your favorite fall food? Let me know!

Your cider donut obsessed friend,

C

  • Servings: 12 people
  • Difficulty: medium
  • Print

Ingredients:

For the cake:

1 firm apple (I like granny smith), peeled and chopped

¾ cup apple cider

¼ cup skim milk

2½ cups all-purpose flour

1½ teaspoons baking powder

½ teaspoon baking soda

1 teaspoon salt

1 teaspoon ground cinnamon

¼ teaspoon ground nutmeg

⅛ teaspoon ground allspice

1 stick unsalted butter, softened

¾ cup granulated sugar

½ cup brown sugar, packed

3 eggs

¼ cup vegetable oil

1 teaspoon vanilla bean paste or vanilla extract

For the glaze:

½ stick unsalted butter

¼ cup granulated sugar

⅛ cup water

¼ cup whiskey

For the cinnamon sugar:

6 tablespoons granulated sugar

1 teaspoon cinnamon

⅛ teaspoon nutmeg


Steps:

  1. Preheat your oven to 350 degrees. Grease your bundt pan with non-stick cooking spray.
  2. In a small sauce pan, combine the chopped apple and cider. Bring to a boil, reduce to simmer, and cook for about 10 minutes until the apples are tender. Remove from heat and let cool slightly before blending. If you are using a conventional blender, fill only halfway, slightly crack the lid (to prevent the top from blowing off), and then cover the lid with a towel before blending. If you are using a food processor, only fill to the max liquid line. Blend until completely smooth.
  3. Measure out one cup of the apple puree – if you do not have enough liquid, add in additional apple cider to make the full amount. Add in the skim milk, stir to combine and set aside.
  4. In a large bowl, combine the flour, baking powder, baking soda, salt, cinnamon, nutmeg, and allspice. Stir to combine and set aside.
  5. In the bowl of a stand mixer, add in the butter, granulated sugar, and brown sugar. Beat until light and fluffly, about 2 minutes. Add in eggs one at a time, followed by the vegetable oil and vanilla bean paste/extract. Stir to completely combine, stopping to scrap down the sides.
  6. With the mixer on low, alternate adding the flour mixture and the apple puree, starting and ending with the flour. Mix until just combined.
  7. Pour the batter into the prepared bundt pan and bake for 35-40 minutes until the cake is golden brown and a toothpick inserted into the cake comes out clean.
  8. While the cake is baking, make the glaze. In a small saucepan, combine the butter, sugar, and water and bring to a boil. Let the mixture boil for 1-2 minutes. Remove from heat and add in the whiskey – be careful because the mixture will bubble up! Set aside.
  9. While the cake is baking, make the cinnamon sugar. In a jar with a tight-fitting lid, combine the sugar, cinnamon, and nutmeg. Screw on the lid and shake vigorously. Set aside.
  10. When the cake is finished, allow it to cool for about 5-10 minutes in the pan. Turn the cake out onto a cooling rack set over a wax paper-lined baking rack. Let the cake cool completely.
  11. When the cake has cooled, brush the cake with the glaze – work in batches to cover the top and sides, allowing one coat to sink into the cake before adding in another. When all the glaze has been brushed onto the cake, sprinkle the cake with the cinnamon sugar – I recommend sprinkling half the cinnamon sugar onto the cake, waiting ten minutes for it to set, and then sprinkling on the second half.

Serve alongside a cold glass of milk. Enjoy!


Recipe lightly adapted from: https://leaandjay.wordpress.com/2014/11/07/apple-cider-donut-cake/


Nutrition Information (1 serving):

391 calories Ÿ• 54gm carbohydrates Ÿ• 1gm fiber Ÿ• 4gm protein •Ÿ 17gm fat Ÿ• 8gm saturated fat Ÿ• 330mg sodium Ÿ• 77mg cholesterol Ÿ• 2mg iron Ÿ• 68mg calcium

Spicy Butternut Squash Soup

IMG_2310

Butternut squash and I are not friends.

We have tried to make it work, but it just isn’t happening.

Three years ago, I bought a beautiful butternut squash and ended up cutting myself with a knife as I tried to peel it (epic fail).

Two years ago, I bought a beautiful butternut squash and ended up hurting myself with a vegetable peeler as I tried to peel it (again, epic fail).

One year ago, I stared at the beautiful butternut squashes at the farmer’s market and decided that it was safer that I avoided them all together (*sob*).

BUT, this year my mom decided that it was time to get back on the horse and try making butternut squash again. So I let her do the peeling!

I love roasted butternut squash by itself and in many different dishes, but I think my favorite butternut squash recipe is a beautifully simple butternut squash soup. No muss, no fuss, and it’s absolutely delicious.

It starts with butternut squash.

IMG_2219

This is one medium-sized butternut squash that my mom peeled and I chopped into about 1-inch cubes. With the squash all prepped, you can move forward with the soup.

In a large, heavy soup pot set over medium heat, add in some butter.

IMG_2220

And then toss in some chopped onion and cook until the onion becomes soft and translucent.

IMG_2224

Now, it’s time to throw in the squash. Toss it around in the butter and onions to get everything combined.

IMG_2226

To pump up the orange color and add a touch of sweetness, we added in some carrot. This is one soup that is loaded with vitamin A (which is important for healthy skin and eyes!).

IMG_2231

Then all that’s left is to add in some chicken broth and water, bring the soup to a boil, and then simmer it for about 30 minutes until the squash becomes fork tender.

Now comes the slightly dangerous part – the pureeing of the soup. If you have an immersion blender, I am super jealous. You can puree the soup right in the pot and be done with it. If you don’t, grab your blender or your food processor. Working in small batches (either filling only half the blender or filling to only the max liquid line of a food processor), puree the soup until smooth. I transferred the pureed soup to a big bowl so that I could reuse my soup pot – it made it a little easier!

Pour the pureed soup back into the pot and then season with salt, pepper, a touch of nutmeg, and the one surprise ingredient – cayenne pepper! It doesn’t overpower the flavor of the squash, but it adds another dimension to the soup.

IMG_2233

All that’s left is to heat the soup through and then serve it up.

IMG_2326

We garnished out soup with some diced apple and a sprinkle of nutmeg, but if you want to be really bold, add in a sprinkle of cayenne too!

IMG_2329

A perfect soup for a chilly fall day.

(And a hopeful future for a friendship between butternut squash and I!)

Happy Tuesday, kiddos!

oxox,

The Girl Who Is Frenemies with Butternut Squash

Spicy Butternut Squash Soup

  • Servings: 4 people
  • Difficulty: medium
  • Print

Ingredients:

2 tablespoons unsalted butter

1 medium onion, chopped

1 medium-sized butternut squash, cut into 1-inch chunks (about 4 cup of squash)

1 cup carrots, chopped

3 cups low sodium chicken broth

1 cup water

¼ teaspoon ground nutmeg

¼ teaspoon cayenne pepper – use less if you’re more sensitive to heat

Salt and pepper to taste


  1. In a large, heavy-bottom soup pot set over medium heat, melt the butter. When the butter is melted, add in the onion and cook until they become soft and translucent, about 2-3 minutes.
  2. Add in the butternut squash and the carrots and stir to mix all the vegetables together. Pour the chicken broth and water over the vegetables and bring the mixture to a boil. When the liquid is boiling, reduce the heat to a simmer and cook for about 30 minutes or until the squash is fork-tender.
  3. To puree the soup, use an immersion blender, conventional blender, or a food processor. If you are using an immersion blender, you can blend directly in the soup pot.


If you are using a conventional blender, fill only halfway, slightly crack the lid (to prevent the top from blowing off), and then cover the lid with a towel before blending. If you are using a food processor, only fill to the max liquid line. Working in batches, puree the soup and then pour into another soup pot.


  1. Return the soup to medium heat and stir in the nutmeg, cayenne pepper, salt, and pepper. Taste and adjust seasoning as desired.

Serve immediately with a fresh chopped apple garnish and an additional sprinkle of nutmeg.

Enjoy!

Recipe lightly adapted from Simply Recipes: http://www.simplyrecipes.com/recipes/butternut_squash_apple_soup/.

Nutrition Information (1 serving):

168 calories •Ÿ 24gm carbohydrates Ÿ• 4gm fiber Ÿ• 6gm protein Ÿ• 7gm fat Ÿ• 4gm saturated fat Ÿ• 322mg sodium Ÿ• 84mg cholesterol •Ÿ 2mg iron Ÿ• 93mg calcium

Stuffed Acorn Squash

IMG_1659

I love acorn squash.

Absolutely love it.

When it starts to appear in the grocery store in late September, I become obsessed. All I want to do is buy it all, cook it, and dig in. And repeat.

While I love simple baked acorn squash, my friend DK actually gave me a recipe for STUFFED acorn squash a few years ago that took my favorite fall side and turned it into a meal. Needless to say I tried it the same night she gave it to me and have been in love with it ever since.

This dish is the perfect combination of fall flavors – squash, apple, and sausage. Basically, it is October in a meal.

It starts with two acorn squashes that have been washed thoroughly, dried, and cut in half lengthwise. Scoop out the seeds and set the halves cut-side up into a deep-sided baking dish (I used my roasting pan) lined with a silicon baking mat or with some parchment paper.

IMG_1619

I brushed the cut-sides of the squash with melted butter and seasoned it with salt and pepper. I popped the roasting pan into a 400 degree oven for about 1 hour until the squash is just tender.

While the squash is roasting in the oven, you have plenty of time to whip up the stuffing.

IMG_1623

In a large high-sided skillet set over medium-high heat, throw in one pound of sweet Italian sausage – I can only find sweet Italian sausage links at my grocery, so I just slit the casing and peel it off before tossing into the skillet. If you can find bulk Italian sausage though, grab that and use it!

IMG_1633

Cook the sausage until it’s all crumbled and brown. Drain the sausage in a colander to remove the excess grease and transfer them to a plate and drain any excess fat from the skillet.

IMG_1624

Place the skillet back on the heat, turn it down to medium, and add in about 2 teaspoons of olive oil, some finely diced onion, and finely diced celery.

IMG_1627

And I threw in a couple sprigs of fresh thyme – it adds a bit of herby freshness to all the rich fall flavors. I cooked the veggies for a couple minutes until they become tender and start to become golden.

IMG_1628

Then I threw in some finely chopped apple (that has been peeled first) – I used one gala apple and one granny smith, but any firm apple works here! Sauté the apples and veggies for another couple minutes until everything is soft and tender. Then turn off the heat.

IMG_1634

And toss in the cooked sausage and some seasoned bread crumbs to the veggie mixture and stir to combine. Taste the filling and add salt and pepper to taste. Then stir in one beaten egg. Set the filling aside until the squash comes out of the oven.

When the squash is tender, pull it out of the oven.

IMG_1646

Fill up the cavity of the squash with the filling. Lightly pack the filling into the cavity, but don’t pack it down too much – if the filling is too compressed, it becomes too dense and doesn’t cook through (raw egg is not awesome). Pop the squash back into the oven and cook the squash until the filling is cooked through and golden brown.

IMG_1661

All that you need to do is plate up and chow down. This is definitely a fall dinner winner (say that three times fast!). I hope you enjoy this recipe, kiddos.

Your acorn squash obsessed friend,

C

Stuffed Acorn Squash

  • Servings: 4 people
  • Difficulty: easy
  • Print

Ingredients:

For the squash:

2 medium-to-large acorn squashes, cut in half and seeded

1 tablespoons unsalted butter, melted

Salt and pepper to taste

For the filling:

1 pound sweet Italian sausage

2 teaspoons olive oil

½ cup onion, finely diced

1 celery rib, finely diced

3-4 sprigs fresh thyme

2 apples (I like gala or granny smith), finely chopped

1 cup seasoned breadcrumbs

1 egg, beaten

Salt and pepper to taste


Steps:

Preheat oven to 400 degrees. Line the bottom of a high-sided roasting pan with a silicon baking mat or with some parchment paper.

For the squash: When the oven is at temperature, place the squash halves in the pan, cut side up. Brush the cut sides of the squash with the melted butter and season them with salt and pepper. Place the pan into the oven and roast the squash for about 1 hour or until the squash just become fork tender.

For the filling:

  1. In a high-sided skillet set over medium-high heat, toss in the sausage and cook until crumbled and browned, about 5 minutes. Remove from the heat and drain the sausage in a colander. Place the sausage on a plate and set aside. Drain the grease from the skillet.
  2. Place the skillet back onto a burner set to medium heat and add in the olive oil. When the oil become hot, add in the onion, celery, and thyme. Cook the veggies for about 2-3 minutes until they are soft and turning slightly golden brown.
  3. Add in the chopped apples and continue to cook for about 2-3 additional minutes until everything is soft and tender. Remove the skillet from the heat.
  4. Add in the sausage and the breadcrumbs. Stir to combine – taste for seasoning, adding in salt and pepper to taste. Stir in the beaten egg. Set aside until the squash is finished roasting.

Assembly:

  1. Remove the squash from the oven. Fill the cavity of the squash with the stuffing. Place the pan back into the oven and bake for about 20 minutes until the filling is golden brown and cooked through.

Serve immediately to hungry family and friends!


Nutrition Information (1 squash half):

522 calories Ÿ• 58gm carbohydrates •Ÿ 7gm fiber Ÿ• 22gm protein •Ÿ 28gm fat Ÿ• 10gm saturated fat Ÿ• 1281mg sodium Ÿ• 101mg cholesterol Ÿ• 4mg iron •Ÿ 161mg calcium

Pumpkin Bread

IMG_1698

It has been officially October for over a week and all I can think about is pumpkins, pumpkins, pumpkins. From picking the perfect pumpkin for a Jack-o-Lantern to finding armloads of mini pumpkins to place all over my house to whipping up our favorite pumpkin recipes, the orange fruit is forefront in my mind.

Of all the pumpkin-related activities that you can do this fall, my favorite thing to do is make pumpkin baked goods. You all know that my absolutely, positively, #1 go-to pumpkin baked good is Mini Pumpkin Chocolate Chip Muffins, but today I’m sharing my family’s ultimate pumpkin treat.

Good Old Fashion Pumpkin Bread.

I always notice that around Labor Day, boxed pumpkin bread mix starts appearing on store shelves in anticipation of the holiday baking rush. As much as I love and use boxed bread/muffin/cake/brownie mix, I think that some things taste better when you make them from scratch… and this pumpkin bread is one of those things. Try it once, and you’ll be hooked (promise!).

This bread has three teams of ingredients and comes together very quickly in the stand mixer. You can also use a hand mixer if that’s what you have.

The first team is the dry ingredient team.

IMG_1663

Flour, sugar, baking powder, baking soda salt, cinnamon, nutmeg, and allspice. Blend those together and set aside while you get the second team together.

The second team is the wet ingredient team.

IMG_1664

In the bowl of a stand mixer, combine eggs, vegetable oil, and pumpkin puree. If you have homemade pumpkin puree, you are my hero and please use it here (and can you please send me some?). I always have canned pumpkin puree in my pantry from September thru January, so that’s my go-to. Beat the eggs and pumpkin together until combined.

Then, get together the third team… which is water. Yep, measure out ⅔ cup of water into a measuring cup with a spout.

And now you’re ready to make pumpkin bread (and yes, I may have forgotten to take photos but it’s easy!). With the mixer on low, add in the dry ingredients and water alternately, starting and ending with the flour.

IMG_1666

Mix the batter until just combined and pour it into two greased loaf pans with a sheet of parchment on the bottom (for easy removal). All that’s left is to bake them at 350 degrees for about 45-60 minutes.

IMG_1669

Divine!

IMG_1700

All that’s left is to let it cool slightly in the pans, turn it out onto a cooling rack to cool completely, and then slice up for your family to enjoy.

IMG_1712

Or you could keep it all to yourself (I won’t judge!).


So, kiddos, what’s your favorite pumpkin baked good?

Your pumpkin obsessed friend,

C

Pumpkin Bread

  • Servings: 20 slices
  • Difficulty: easy
  • Print

Ingredients:

3½ cups all-purpose flour

2 cups granulated sugar

2 teaspoons baking soda

2 teaspoons salt

1 teaspoon baking powder

1 teaspoon cinnamon

1 teaspoon nutmeg

1 teaspoon allspice

4 eggs

1 cup vegetable oil

1-15oz can of pumpkin pureed – about 1⅓ cup homemade pumpkin puree

⅔ cup water


Steps:

  1. Preheat your oven to 350 degrees. Spray two loaf pans with cooking spray and place a rectangle of parchment paper on the bottom of each pan. An easy way to measure a piece of parchment that will fit is to outline the bottom of the loaf pan on the parchment and cut it out.
  2. In a large bowl, combine the flour, sugar, baking soda, salt, baking powder, cinnamon, nutmeg, and allspice. Whisk to combine. Set aside.
  3. In the bowl of a stand mixer (or in a large bowl with a hand mixer), beat together eggs, vegetable oil, and pumpkin puree. With the mixer on low, add in the dry ingredients and water alternatively, starting and ending with the flour. Mix until just combined.
  4. Pour the batter into the prepared loaf pans and pop the pans into the oven. Bake for 45-50 minutes, or until a toothpick in the center of the bread comes out clean. Cool the bread in the pans for 10 minutes and then turn them out onto a cooling rack to allow them to cool completely.

Enjoy!


Nutrition Information (1 slice):

274 calories Ÿ• 39gm carbohydrates •Ÿ 1gm fiber Ÿ• 4gm protein Ÿ• 12gm fat Ÿ• 1gm saturated fat Ÿ• 313mg sodium Ÿ• 37mg cholesterol Ÿ• 2mg iron •Ÿ 29mg calcium

A Weekend Recap… A Day Late

Hi there! How are you? How was Halloween? What did you do? Did you go trick-or-treating? Did you sit home and watch movies? Do nothing?

I had class until late on Friday, so I showed up to our friends’ house (and Halloween maze extravaganza) a little bit late (and a lotta bit cranky) and indulged in some wine, some pastichio (Greek lasagna), and some good conversation.

IMG_2046

Oh and some homemade chocolate lava cakes (please excuse the blurry photo – I was trying to grab a photo before devouring the whole thing in 2 bites). Paired with the ability to boss people around in the maze with a megaphone, it was the perfect ending to a long and exhausting day.

This weekend was all about getting work done and relishing the extra hour of sleep we received on Sunday… but all work and no play is never a good thing.

IMG_2050

Which makes coffee breaks with a good friend all the more important. Cappuccinos, anyone?

My weekend eating ended with our traditional big Sunday dinner, which was composed of grilled salmon, roasted vegetables, and brown rice.

IMG_4977

Along with leftover stuffed acorn squash! This dish is probably my favorite fall dish because it truly has all the flavors of fall. My mom and I adapted the recipe from one I found on food.com. We left out the celery, mushrooms, and sage, used honey crisp apples, didn’t top with cheese at the end, and only used about ¾ of the stuffing in the squash and made the remaining stuffing into stuffin’ muffins! Super delicious, a great way to highlight acorn squash, and a perfect meal for a cold winter night.


This weekend was full of good eating – what a way to start off November!

Your food lovin’ friend,

C

Pumpkin Chocolate Chip Muffins

IMG_4925

Happy Last Monday of October! Can you believe that Halloween is on Friday? I may need to get more candy… *burp*

Yeah, that’s probably a good idea.

Despite to proliferation of candy in my house, Halloween (to me at least) means pumpkin baked goods. And my favorite pumpkin baked good is pumpkin chocolate chip muffins.

My parents discovered these nuggets of happiness during a winter festival in our downtown many, many years ago. They loved them so much and actually bought the muffin recipe book so that they could make them for the rest of their lives.

And they have. These pumpkin chocolate chip muffins have become insanely popular amongst our family and friends. They have become fixtures during our elementary school playdates, become a bonding moment with college roommates, and midnight snacks for dietetic interns.

All in all, they are pumpkin perfection. Here’s my adaptation of my favorite holiday treat.

In a skillet heated over medium heat, toast up some sliced almonds. Watch them carefully, or they’ll burn!

IMG_2237

A note about the type of almonds to use. My dad prefers sliced almonds. My mom prefers slivered almonds. My sister prefers no almonds. I prefer whatever gets the muffins into my mouth the fastest… and since I only had sliced almonds, that’s what I used. But feel free to use slivered almonds if you want. Follow your bliss!

In a separate bowl, combine flour, sugar, baking powder, baking soda, salt, cinnamon, nutmeg, and allspice.

IMG_2240

Stir to combine.

Then in the bowl of a stand mixer (you can do this by hand if you want!), dump in some pumpkin puree and two eggs.

IMG_4876

Beat them together until combined.

Please excuse the dark, grainy photo…

IMG_4877

With the mixer on low, pour in some melted butter.

IMG_2247

Then slowly add in the dry ingredients.

When the dry ingredients are just combined, remove the bowl from the mixture and dump in the toasted slivered almonds and some mini chocolate chips.

IMG_2254

Stir to combine and then portion out into mini muffin tins.

IMG_2257

I used a tablespoon but a mini ice cream scooper would be the best to get each one the same size.

Then bake them up!

IMG_2261

And dig in!

IMG_2265

As much as I love them room temperature, they taste even better frozen (but that’s just me!). A spectacular treat for after-school snack, dessert, or midnight snack by the light of the fridge.

IMG_4927

Enjoy the last bit of October, kiddos.

Your pumpkin lovin’ friend,

C

Pumpkin Chocolate Chip Muffins

  • Servings: 40-48 mini muffins
  • Difficulty: easy
  • Print

Ingredients:

½ cup of raw almonds, slivered or sliced

1⅔ cups of all-purposed flour

1 cup of granulated sugar

2 teaspoons of ground cinnamon

½ teaspoon of ground nutmeg

½ teaspoon of ground allspice

1 teaspoon of baking soda

¼ teaspoon of baking powder

¼ teaspoon of salt

1 heaping cup plain pumpkin puree

2 eggs

1 stick of unsalted butter, melted and cooled

1 cup of mini semi-sweet chocolate chips


Steps:

  1. Preheat your oven to 350 degrees. Grease 4 mini muffin tins with non-stick cooking spray.
  2. In a skillet heated over medium heat, toss in the almonds and toast until golden brown.
  3. In a medium-sized bowl, combine flour, sugar, cinnamon, nutmeg, allspice, baking powder, baking soda, and salt. Set aside.
  4. In the bowl of a stand mixer (or if you want to work out your arm muscles, you can mix the batter by hand!), add in pumpkin puree and eggs. Beat together until combined.
  5. Slowly drizzle in the melted butter. Stir until combined.
  6. Slowly add in the dry ingredients. Mix until just combined. Remove from stand mixer.
  7. Fold in toasted almonds and mini chocolate chips. Using a tablespoon or a mini ice cream scoop, portion out the batter into the greased mini muffin tins.
  8. Bake the muffins for 18-22 minutes, or until a toothpick inserted into the middle of the muffin comes out clean. Cool completely before serving… but they taste even better when frozen!

Enjoy!

Recipe adapted from Muffins by Elizabeth Alston.

Nutrition Information (1 muffin):

94 calories • 13gm carbohydrates • 1gm fiber • 1gm protein • 5gm fat • 2gm saturated fat • 63mg sodium • 17mg cholesterol • 1mg iron • 12mg calcium

Weekend Eating

I ate a lot this weekend.

Well, I normally eat a lot on the weekends, but this weekend was different… somehow.

I think what separated this weekend from the other 51 was that many meals I chose were seasonal and very fall-like. Nothing like celebrating the season with some good food (and good company!).


The weekend started with an amazing lunch during my tour of the urban gardens in the Bronx.

IMG_3182

Roasted chicken, sautéed spinach, rice pilaf studded with beans, peas, and corn, and a barley salad full of butternut squash, red bell pepper, and scallions. Delicious, nutritious, and warm – the perfect warm-up break during a soggy day touring through gardens.

Despite my filling lunch, I cannot be in NYC without getting a pretzel.

IMG_1411

No matter what, before I leave, I need to have a pretzel… extra salt, please!


Sunday mornings in my house means one thing – a big breakfast. Waffles or pancakes are on the menu, usually studded with chocolate chips. But, in deference to the season, we decided to dive into the world of pumpkin breakfast items.

IMG_4739

These are Smitten Kitchen’s pumpkin waffles. Pumpkin perfection (plus they make the house smell like pumpkin bread)!

I adorned my waffles with the two things that I love to pair with pumpkin – chocolate and almonds.

IMG_4750

Yum!

The best fuel for a morning full of church and a trip to the farmer’s market.


My weekend of chowing down culminated in the farm-fresh salads my family made for lunch. We laid out a bunch of salad ingredients and let everyone create their own.

IMG_4754

Mine took a salad niçoise turn… salad greens, tuna, soft-ish boiled eggs, cucumber, and tomatoes. So it’s salad niçoise minus the green beans, olives, capers, and anchovies. Similar? Ehh, maybe not. But it was still a perfect lunch!


It was a great weekend full of fall foods, sweet and savory. Now it’s back to reality… PB&J for lunch, anyone?

Your still in a food coma friend,

C

Summer Nostalgia

E came home this weekend to surprise my mom for her birthday since she can’t come home during the week… It has truly been a great weekend full of food, family time, and reminiscing about our favorite times with our mom.

Our final day together, Sunday, also ushered in the first real fall day where we live. Crisp blue skies, the leaves [finally] starting to change colors, and a welcome drop in temperature… absolute perfection.

As we snuggled on the couch reading, posting on Facebook, and talking, I began thinking that summer was definitely over and I started to realize that I was missing all the amazing food we made and ate this summer. I was having an epic case of summer food nostalgia.

IMG_4129

Like heirloom tomato and fresh mozzarella salad.

IMG_4118

Or Challah French toast topped with peaches and blueberries.

Grilled vegetables…

IMG_3996

And beer… definitely a summertime indulgence.

Or just the simple pleasure of picking out tomatoes at the farmer’s market.

IMG_4282

And who can forget about dessert?

IMG_3939

Blueberry pie, anyone?

Or a refreshing cherry-pomegranate sherbet.

IMG_3575 - Version 2

*sigh*


As much as I will miss all the wonderful things we made and ate this summer, I look forward to seeing what culinary creations the fall will bring (hello, Thanksgiving!!).

Love your summer food missin’ friend,

C

Fall Salad with Grilled Salmon

IMG_4455

It is now (un)officially fall, which means that I can unapologetically consume every pumpkin, apple, spice, and cranberry product within arms reach without anyone questioning my sanity (and season identifying skills).

My parents left me (and The Cat) home alone this weekend with a plethora of leftover grilled salmon, which we took upon ourselves to finish…

So, in honor of the new season, I decided to make a fall salad and top it with some of the grilled salmon.

And it was the perfect answer to all of my life’s dreams and goals.


It starts with the “fall” components of the salad.

IMG_4444

Dried cranberries, sliced almonds, and some sliced green onion. Sweetness, crunch, and zip.

The lettuce I used was some arugula that was hanging out in my fridge, but you can use any type of lettuce you like.

IMG_4445

Confession… the lighting was wonderful on/around my stove, so I took all my pictures on the range top. Please don’t judge me (but how awesome do the pictures look though!).

IMG_4447

Place a piece of salmon on top of the arugula.

IMG_4449

Sprinkle on the dried cranberries.

IMG_4450

The sliced almonds.

IMG_4451

And the green onions.

IMG_4452

Then some red wine vinaigrette dressing.

This is how you make it (super easy and so yummy)!

IMG_4434

In a container with a tight sealing lid, pour in some olive oil.

IMG_4435

Then add some red wine vinegar.

IMG_4436

And a good amount of mustard, salt, pepper, and dried oregano.

IMG_4437

Put on the lid and shake vigorously!

IMG_4439

Then you have a perfect vinaigrette that you can use on everything.

IMG_4453

Like Fall Salad with Grilled Salmon!


Enjoy, kiddos!

Your salad makin’ friend,

C

Red Wine Vinaigrette

  • Servings: one person
  • Difficulty: easy
  • Print

Ingredients:

1 tablespoon olive oil

2 teaspoons red wine vinegar

1 ½ teaspoon Dijon mustard

½ teaspoon salt

½ teaspoon black pepper

1 teaspoon dried oregano


Steps:

Combine all ingredients into a jar with a tight sealing lid. Close the jar and shake vigorously to combine. Serve immediately or keep in the fridge for 2-3 days.